Everyone have their own ways of setting up service accounts. Technically its possible to run every SharePoint service under ONE account, lets follow the least privilege principle best practice.
SharePoint 2013 Service Accounts Naming convention:
When you are running with multiple SharePoint 2013 environments like Dev, Test and Production (Best Practice!) you can explicitly segregate the service accounts in their names. Such as: SP13_PROD_Setup.
Here is my list of SharePoint 2013 service accounts and permissions needed to setup, manage and administer SharePoint:
Your service accounts must have Log on a service, Log on as a batch job, and Allow log on locally properties set to ON (By default these properties are ON, unless you have very tight security policies)
How to change SharePoint 2013 service account
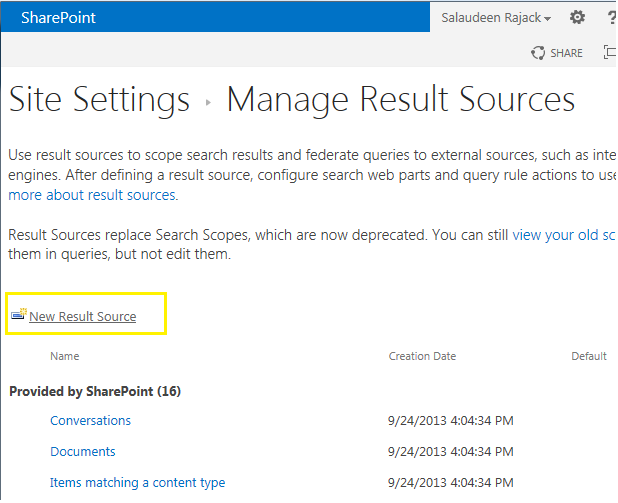
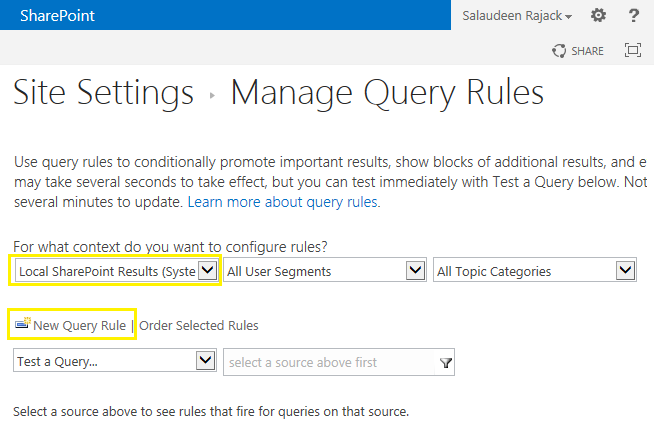
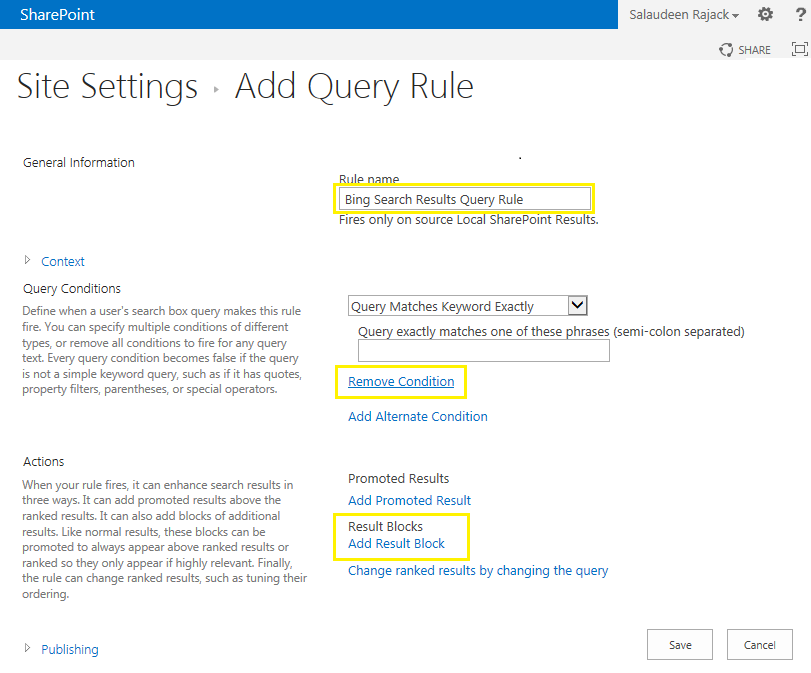
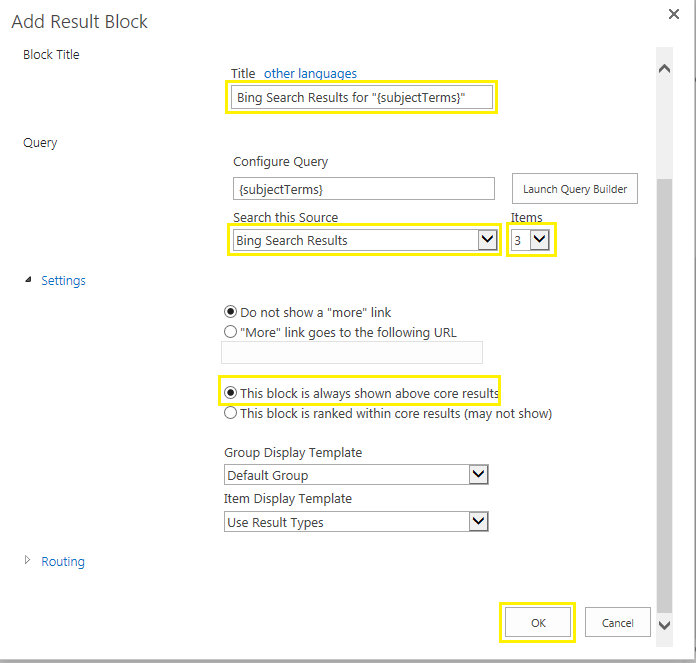
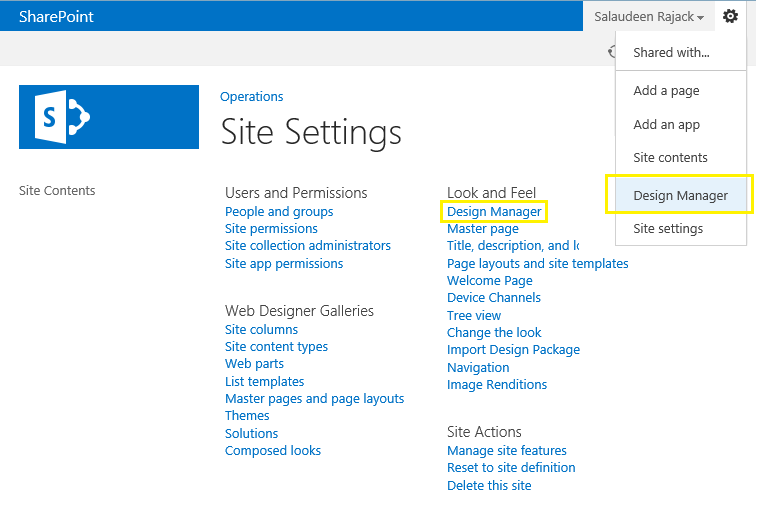
Managed Accounts can be registered via Central Administration >> Security >> Configure managed accounts. To configure service accounts as managed account, refer: Create New Managed Account in SharePoint 2013 Using Powershell
After setting up the managed accounts, you can start assigning to some services. Go to Central Administration >> Security >> Configure service accounts page to associate service accounts with SharePoint services, such as "Farm account".
![how to change sharepoint 2013 service account]() SharePoint 2013 change search service account
SharePoint 2013 change search service account
![sharepoint 2013 change farm service account]()
To Create SharePoint Service Accounts in AD using PowerShell: http://www.sharepointdiary.com/2014/08/create-sharepoint-service-accounts-using-powershell.html
SharePoint 2013 service accounts reference in technet![]()
SharePoint 2013 Service Accounts Naming convention:
When you are running with multiple SharePoint 2013 environments like Dev, Test and Production (Best Practice!) you can explicitly segregate the service accounts in their names. Such as: SP13_PROD_Setup.
Here is my list of SharePoint 2013 service accounts and permissions needed to setup, manage and administer SharePoint:
Account Name | Description | Rights | Managed Account? |
SP13_Setup | The Setup account is used to perform the following tasks: -SharePoint Installation -Runs SharePoint Products Configuration Wizard -Configure and manage the server farm, farm configuration wizard | Local Administrator on all the SharePoint Servers. On the SQL Server SecurityAdmin and DBCreator Server Roles. It needs DBO access on Content databases to run PowerShell, Which should be added later (Add-SPShellAdmin). | No |
SP13_Farm | - Application pool identity for the SharePoint central Administration Web site. - Database access account -Runs SharePoint Timer Service. | Additional permissions automatically granted to the farm account on web servers and application servers that are joined to a server farm. Account needs to be in the local administrators group at the time of User Profile Provisioning! | Yes |
SP13_Pool | The account is used to run the Web Application Pools | None | Yes |
SP13_Services | Account is used to run the service applications | None | Yes |
SP13_Crawl | The default content access account for the search service application | Read-only Access on all external sites. | No |
SP13_UserProfile | The account used to Import user profile and provides synchronization between SharePoint and AD. | Replicate Directory Changes permission on the domain. | No |
SP13_SuperUser | Cache account for web application super user account | Web application Policy Full Control | No |
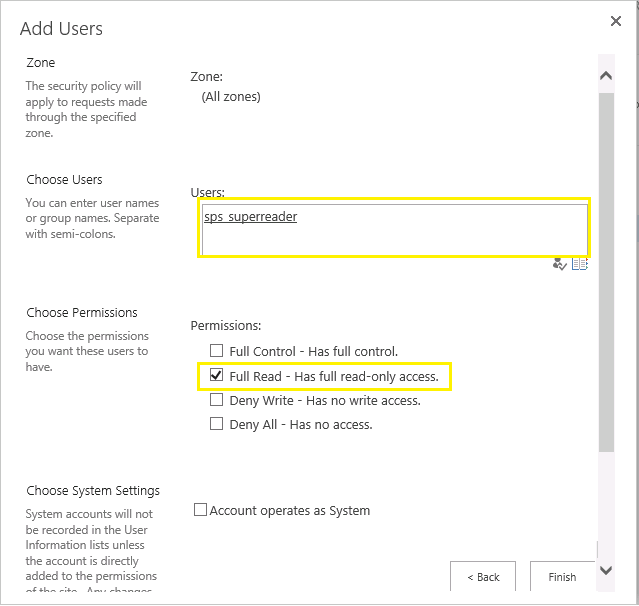
SP13_SuperReader | Cache account for web application super reader account | Web application Policy Full read | No |
SQL_Admin | SQL Admin on the SQL Server. Used to install the SQL Server. | Local Administrator on the SQL Server | No |
SQL_Services | service account for the following SQL Server services | None | No |
Your service accounts must have Log on a service, Log on as a batch job, and Allow log on locally properties set to ON (By default these properties are ON, unless you have very tight security policies)
How to change SharePoint 2013 service account
Managed Accounts can be registered via Central Administration >> Security >> Configure managed accounts. To configure service accounts as managed account, refer: Create New Managed Account in SharePoint 2013 Using Powershell
After setting up the managed accounts, you can start assigning to some services. Go to Central Administration >> Security >> Configure service accounts page to associate service accounts with SharePoint services, such as "Farm account".


To Create SharePoint Service Accounts in AD using PowerShell: http://www.sharepointdiary.com/2014/08/create-sharepoint-service-accounts-using-powershell.html
Important: All accounts must be a domain accounts! No local account can be used as SharePoint service account.
Depending on your organization's security policies, you may have to add/remove service accounts to this list. You may consider additional Service Application for services such as Excel Unattended Service, Visio, etc.SharePoint 2013 service accounts reference in technet