Quantcast
Channel: SharePoint Diary
Viewing all 1058 articles
Browse latest View live

Getting Login Prompt on Anonymous Access Enabled SharePoint Sites?

$
0
0
Problem: We Enabled anonymous access to a SharePoint 2013 and users still getting Login prompts!

Solution: Here is the check list for troubleshooting.
  1. Anonymous access must be turned on both in at Web Application level and at SharePoint site level. Double check your settings with How to Enable Anonymous Access in SharePoint 2013 
  2. On publishing sites, try disabling the feature "Limited-access user permission lockdown mode" at site collection level.
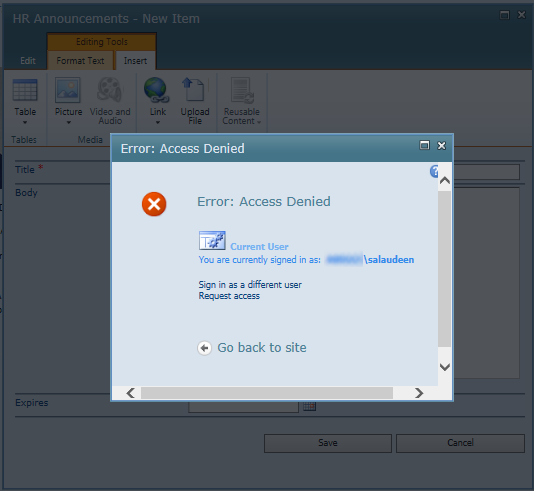
     sharepoint anonymous access prompt login
  3.  If the default home page, say default.aspx page is not published & approved, users get login prompt!
  4. If any referenced resources like images, scripts, css files, etc from other libraries requires authentication - You'll get authentication prompt! E.g. You may have a css style sheet from the library "", which may not allow anonymous access! Check the permission for the specific library and grant anonymous users to "Read" the content.
  5. Navigate to the IIS Virtual directory on File system using Windows Explorer, Go to Security tab, make sure that "Everyone" has Read privileges. If not, Add it!
  6. In IIS, Expand your web application, Click on "Authentications", Make sure "Anonymous Authentication" is enabled.
    sharepoint anonymous access prompt for login
  7. In SharePoint 2013 Central Administration >> Application Management >> Manage Web applications, select the web application and Click on "Anonymous Policy". Make sure that "None – No Policy" is selected.
  8. If you enabled Anonymous access at list/library level: Delete unique permissions once, stop inheriting permissions and then grant anonymous access again.

Enable Anonymous Users to Add New List Items in SharePoint

$
0
0
Problem: Add items greyed out for Anonymous access users. We got to enable anonymous users to add  list Items in a SharePoint list.

Solution: By default, Add/Edit/Edit access is disabled for anonymous users. They are granted only with "Read" access. But for a "Contact Us / Feedback" list in our public SharePoint site, we had to enable anonymous user to submit their questions and feedback (add new list items). 
sharepoint 2013 anonymous access add items greyed out
 So, How to enable Anonymous users to add list items in SharePoint? Follow these steps:
  • Go to the list settings >> Permissions for this list
  • Click on "Stop Inheriting Permissions" from Permissions tab of the Ribbon. 
  • You'll see the "Anonymous Access" Icon appearing on the ribbon. Click on that.
  • Enable "Add Items - Add Items to lists" check box and click "Ok"
     sharepoint 2013 anonymous access add items
  • Here is the result in action
     sharepoint anonymous access add list item
Now, anonymous access users can add list items in SharePoint!

Force Stop SharePoint Search Crawl using PowerShell

$
0
0
Problem: SharePoint 2013 search crawl process is running infinitely!

Solution:
Tried stopping the crawl process from search administration page of SharePoint 2013 central administration, but failed.
force stop crawl sharepoint 2013 powershell
PowerShell to rescue! This script checks whether the crawler status is "Idle" for the given content source. If not, it stops the crawl activity and wait until the status is changed to Idle.

PowerShell script to force stop SharePoint 2013 search crawl:
To stop Search crawl forcefully in SharePoint, use this script. 
Add-PSSnapin Microsoft.SharePoint.Powershell -ErrorAction SilentlyContinue

#Content source Name
$ContentSourceName= "Crescent Portal" #default "Local SharePoint sites"

#Get the search service application
$SSA = Get-SPEnterpriseSearchServiceApplication #-Identity "Search Service Application Name"

#Get the content source
$ContentSource = $SSA | Get-SPEnterpriseSearchCrawlContentSource -Identity $ContentSourceName

#Check if Crawler is not already running
if($ContentSource.CrawlState -ne "Idle")
{
Write-Host "Stopping Crawl..."

$ContentSource.StopCrawl()

#Wait till its stopped
while($ContentSource.CrawlState -ne "Idle")
{
Write-Host "Waiting to crawl to be stopped..." -f DarkYellow
sleep 5
}
write-host "Crawl Stopped Successfylly!" -f DarkGreen
}
else
{
Write-Host "Search Crawl is not running!" -f Red
}

I used this script when the crawler stuck in the stopping state! Related post: Start SharePoint Search Crawl using PowerShell

Add New Content Source in SharePoint 2013 Search using PowerShell

$
0
0
Requirement: Create new search content source in SharePoint 2013.

PowerShell script to add new content source:
Here is the PowerShell script to create new content source in SharePoint 2013 search.
Add-PSSnapin Microsoft.SharePoint.Powershell -ErrorAction SilentlyContinue

#Variables for new content source creation
$ContentSourceName= "Intranet Portal" #default "Local SharePoint sites"
$ContentSourceType="SharePoint"
$ContnetSourceURL="http://portal.crescent.com"

#Get the search service application
$SSA = Get-SPEnterpriseSearchServiceApplication #-Identity "Search Service Application Name"

#Check if the given content source Name exits already
$ContentSource = Get-SPEnterpriseSearchCrawlContentSource -SearchApplication $SSA | where {$_.Name -eq $ContentSourceName}
if ($ContentSource)
{
write-host "Content Source Name already exist!" -f Red
exit
}

#Create new content source
$ContentSource = New-SPEnterpriseSearchCrawlContentSource -SearchApplication $SSA -Type $ContentSourceType `
-name $ContentSourceName -StartAddresses $ContnetSourceURL -MaxSiteEnumerationDepth 0

write-host "New Content Source has been created!" -f Green

#To delete a content source, use:
#Remove-SPEnterpriseSearchCrawlContentSource -SearchApplication $SSA -Identity $ContentSourceNames
You must run full crawl for any new content source created. Here is how: How to Start SharePoint Search Crawl using PowerShell

New-SPEnterpriseSearchCrawlContentSource reference in technet.

"There was an error during Installation, The tool was unable to install Application Server Role, Web Servers (IIS) Role." In SharePoint 2013 Products Preparation Tool

$
0
0
Problem: SharePoint 2013 Products Preparation Tool  failed with an error "There was an error during Installation - The tool was unable to install Application Server Role, Web Servers (IIS) Role." during prerequisites installation in Windows Server 2012 R2.
There was an error during Installation, The tool was unable to install Application Server Role, Web Servers (IIS) Role.

Solution: Mount the Windows 2012 R2 ISO into the drive and Install the roles offline from Windows Server Installation disk.

PowerShell script to Add necessary Roles & features for SharePoint 2013 (Prerequisites)
Import-Module ServerManager

Add-WindowsFeature NET-WCF-HTTP-Activation45,NET-WCF-TCP-Activation45,NET-WCF-Pipe-Activation45 -Source E:\Sources\sxs

Add-WindowsFeature Net-Framework-Features,Web-Server,Web-WebServer,Web-Common-Http,Web-Static-Content,Web-Default-Doc,Web-Dir-Browsing,Web-Http-Errors,Web-App-Dev,Web-Asp-Net,Web-Net-Ext,Web-ISAPI-Ext,Web-ISAPI-Filter,Web-Health,Web-Http-Logging,Web-Log-Libraries,Web-Request-Monitor,Web-Http-Tracing,Web-Security,Web-Basic-Auth,Web-Windows-Auth,Web-Filtering,Web-Digest-Auth,Web-Performance,Web-Stat-Compression,Web-Dyn-Compression,Web-Mgmt-Tools,Web-Mgmt-Console,Web-Mgmt-Compat,Web-Metabase,Application-Server,AS-Web-Support,AS-TCP-Port-Sharing,AS-WAS-Support, AS-HTTP-Activation,AS-TCP-Activation,AS-Named-Pipes,AS-Net-Framework,WAS,WAS-Process-Model,WAS-NET-Environment,WAS-Config-APIs,Web-Lgcy-Scripting,Windows-Identity-Foundation,Server-Media-Foundation,Xps-Viewer -Source E:\Sources\sxs

Where E:\ is the DVD Drive.

"Connect to Outlook" in SharePoint 2013 Greyed out?

$
0
0
Problem: SharePoint users unable to connect to any SharePoint 2013 list or calendar to Outlook 2013.  The "Connect to Outlook" Ribbon button is always greyed out!
connect to outlook disabled sharepoint 2013 online

Troubleshooting Checklist:
  1. Connect to outlook feature is available only to these type of lists:  Calendar, Tasks, Project Tasks, Contacts, Document Library and Discussion Boards.
  2. Prior to Service pack 1:  If your SharePoint site has Minimal Download Strategy feature enabled, simply press "F5" to reload the current page. You'll get connect to outlook button enabled! Disabling MDS feature is not a good idea IMHO!!
  3. Make sure that "SharePoint Stssync Handler" is enabled in browser add-ons. (IE >> Tools >> Manage Add-ons)
  4. Check the client-integration option of web application settings
  5. This feature works only when you have 32 bit version of office installed in your client machine!
  6. The "WebClient" Service must be running in services console of the client machine!
  7. Try adding your SharePoint site to "Trusted sites zone", Also uncheck "Enhanced Protected Mode" for the zone.
  8. Logged user must have at least "Read" permissions to SharePoint . "View Only" doesn't work!
     

Upload Files to SharePoint Library Remotely using Client Object Model (CSOM) and PowerShell

$
0
0
Requirement: Upload files to SharePoint document library remotely.

PowerShell Script to Upload a File to SharePoint Library using Client Object Model:
We can upload files to SharePoint Online or SharePoint on-premises document libraries remotely using PowerShelland client side object model (CSOM). 
#Load SharePoint CSOM Assemblies
[System.Reflection.Assembly]::LoadWithPartialName("Microsoft.SharePoint.Client") | Out-Null
[System.Reflection.Assembly]::LoadWithPartialName("Microsoft.SharePoint.Client.Runtime") | Out-Null

##Variables for Processing
$SiteUrl = "http://mgmt.crescent.com/"
$LibraryName="Proposal Documents"
$SourceFile ="D:\Reports\MonthlyRpt.csv"

#Setup Credentials to connect
$Credentials = [System.Net.CredentialCache]::DefaultCredentials #Current User Credentials
#connect using user account/password
#$Credentials = New-Object System.Net.NetworkCredential($UserName, (ConvertTo-SecureString $Password -AsPlainText -Force))
#For Office 365, Use:
#$Credentials = New-Object Microsoft.SharePoint.Client.SharePointOnlineCredentials($UserName,(ConvertTo-SecureString $Password -AsPlainText -Force))

#Set up the context
$Context = New-Object Microsoft.SharePoint.Client.ClientContext($SiteUrl)
$Context.Credentials = $credentials
$web = $Context.Web

#Get the Library
$List = $web.Lists.GetByTitle($LibraryName)
$Context.Load($List)
$Context.ExecuteQuery()

#Get File Name from source file path
$SourceFileName = Split-path $SourceFile -leaf

#Get Source file contents
$FileStream = ([System.IO.FileInfo] (Get-Item $SourceFile)).OpenRead()

#Upload to SharePoint
$FileCreationInfo = New-Object Microsoft.SharePoint.Client.FileCreationInformation
$FileCreationInfo.Overwrite = $true
$FileCreationInfo.ContentStream = $FileStream
$FileCreationInfo.URL = $SourceFileName
$FileUploaded = $List.RootFolder.Files.Add($FileCreationInfo)
$Context.Load($FileUploaded)
$Context.ExecuteQuery()

#Set Metadata
$properties = $FileUploaded.ListItemAllFields;
$context.Load($properties)
$properties["Category"]="Reports"
$properties.Update()
$context.ExecuteQuery()

#Close file stream
$FileStream.Close()
Important: Make sure you have SharePoint 2013 Client Components SDK installed in your client machine prior running this script!

SharePoint 2013 Search Crawl Log History Report

$
0
0
Requirement: Generate SharePoint 2013 search crawl report on daily basis.

Solution: Crawl history can be viewed from SharePoint 2013 search service application as in the below screen. It gives the crawl log history report for all content sources.
sharepoint 2013 crawl history
Why don't we automate it with PowerShell, so that we'll get crawl history report in E-mail?

PowerShell to get crawl log history in E-mail:
This PowerShell script extracts crawl history data and sends out Email.
Add-PSSnapin Microsoft.SharePoint.Powershell -ErrorAction SilentlyContinue

#Get the search service application
$SSA = Get-SPEnterpriseSearchServiceApplication #-Identity "Search Service Application Name"

#Get all content sources
$ContentSources = Get-SPEnterpriseSearchCrawlContentSource -SearchApplication $SSA #| where {$_.Name -eq $ContentSourceName}

$ReportDate = Get-Date -format "dd-MM-yyyy"

#CSS Styles for the Table
$style = "Crawl History Report: "
$style = $style + "<style>BODY{font-family: Arial; font-size: 10pt;}"
$style = $style + "TABLE{border: 1px solid black; }"
$style = $style + "TH{border: 1px solid black; background: #dddddd; padding: 5px; }"
$style = $style + "TD{border: 1px solid black; padding: 2px; }"
$style = $style + "</style>"


#Frame Email body
$EmailBody = $ContentSources | Select Name, SuccessCount, WarningCount, ErrorCount,CrawlStarted,CrawlCompleted, @{label="CrawlDuration";expression={$_.CrawlCompleted - $_.CrawlStarted}} | ConvertTo-Html -Head $style

#Set Email configurations

#Get outgoing Email Server
$EmailServer = (Get-SPWebApplication -IncludeCentralAdministration | Where { $_.IsAdministrationWebApplication } ) | %{$_.outboundmailserviceinstance.server} | Select Address

$From = "CrawlReport@crescent.com"
$To = "SharePointAdmin@crescent.com"
$Subject = "Crawl History Report as on: "+$ReportDate
$Body = "Hi SharePoint Team,<br /><br />Here is a Crawl History report as on $ReportDate <br /><br />" + $EmailBody

#Send Email
Send-MailMessage -smtpserver $EmailServer.Address -from $from -to $to -subject $subject -body $body -BodyAsHtml
Schedule the above script in Windows task scheduler to receive E-mail notifications on schedule basis. Here is the script in action:
sharepoint 2013 search crawl history

Open Documents in Client Application Instead of Browser

$
0
0
Requirement: Enable Microsoft Word documents, Excel Spread sheets and PowerPoint Presentations to open in client applications like Microsoft Word, Excel and PowerPoint instead of opening them in browser directly.

Solution: 
In SharePoint 2013, you can enable open document in applications by configuring an option in document library settings.
  • Navigate to the Library >> Click on "Library Settings" from the Ribbon
  • Under General Settings, Click on "Advanced Settings" link
  • Under "Opening Documents in the Browser", choose "Open in the client application"
    sharepoint 2013 open document in application
  • Click "OK" to save your changes. 
Activate "Open Documents in Client Applications by Default" Feature:
While the above setting sets the document opening behavior at the specific document library, we've a built-in SharePoint 2013 feature called "Open Documents in Client Applications by Default" to control this behavior at site collection level. 

To Activate this feature:
  • Go to Site Settings >> Site Collection Features
  • Click on "Activate" button next to "Open Documents in Client Applications by Default" featuresharepoint 2013 open document in client application
Once you enable "Open Documents in Client Applications by Default" feature at site collection level, any new document library will follow the setting of "Open in the Client application". However for all existing document libraries in the site collection, this setting needs to be changed!

Definitely, you don't want to do it manually for each and every document library in the site collection, isn't it? Lets do PowerShell.

PowerShell script to change document open behavior:
sAdd-PSSnapin Microsoft.SharePoint.Powershell -ErrorAction SilentlyContinue

#Site Collection URL
$SiteUrl = "http://intranet.crescent.com"

#Get All sites under given site collection
$WebsColl = Get-SPSite $SiteURL -Limit All | Get-SPWeb -Limit All

#Iterate through each site
foreach($web in $WebsColl)
{
#Get All document libraries
$LibrariesColl =$web.Lists | where {$_.BaseType -eq "DocumentLibrary" -and $_.BaseTemplate -eq "DocumentLibrary"}

foreach($Library in $LibrariesColl)
{
#Set Document Open behavior
$Library.DefaultItemOpen = "PreferClient"
$Library.Update()
Write-Host "Updated Document Library Settings on $($web.URL+"/"+$Library.RootFolder.URL)”
}
}
This sets all documents in SharePoint 2013 to open document in client applications.

Related post: How to disable office web apps in SharePoint 2013

Exclude SharePoint Site or List from Search Results

$
0
0
SharePoint search results are already security trimmed. Meaning, If an user doesn't has access to a SharePoint site, He/She doesn't see any search results from the particular site collection. Same applies to SharePoint lists even. But in some cases, you may want to prevent certain artifacts from appearing on the search results. E.g. You may want to exclude "Site Assets" library to exclude all images and supported scripts appearing in search!

Exclude site from search SharePoint 2013:
To exclude a SharePoint site from search results,
  • Click on "Search and offline availability" under Search group in Site settings page.
  • Choose "No" for Allow this site to appear in search results option.
  • Click on "OK" to save your changes.
SharePoint search exclude site collection
Set SharePoint Site collection to Exclude from Search Results using PowerShell:
Lets do it with PowerShell, instead of setting each subsites search visibility property manually.

Add-PSSnapin Microsoft.SharePoint.Powershell -ErrorAction SilentlyContinue

#Site collection URL
$SiteCollURL="http://mgmt.crescent.com/sites/reports"

#Get All sites under the given site collection
Get-SPSite $SiteCollURL | Get-SPWeb -Limit all | ForEach-Object {
Write-Host "Processing Web: $($_.ServerRelativeUrl)"

#Set Search visibility property to exclude the site from search
$_.NoCrawl = $true
$_.Update()

Write-Host "Updated Search Visibility on Web:" $_.Title -ForegroundColor Green
}
Please note, content from the given site collection and all of its sub-sites will not appear in search results after a search crawl (incremental or full) completed successfully!

Exclude list from SharePoint 2013 search:
Similarly on SharePoint lists and libraries, under Advanced settings, you have the search visibility option. To exclude all the items in the document library or list from appearing in to search results:
  • Navigate to the List or document library settings
  • Go to advanced settings
  • Set Search option to "No" to exclude document library or list from search in SharePoint, as seen below.
sharepoint 2013 search exclude list
PowerShell script to exclude list from SharePoint search
To exclude list items from SharePoint search results, you can set the NoCrawl Property!
$list.NoCrawl = $true

How about excluding aspx pages like AllItems.aspx, dispform.aspx, etc? Go for: SharePoint Search Crawl Rules

Move Site Collection to Another Content Database using PowerShell

$
0
0
Requirement: Found a SharePoint Site collection growing in size over a period of time and wanted to move the SharePoint 2013 site collection to another content database.

Solution: Use the PowerShell Cmdlet Move-SPSite to move site collection from one content database to another. Here is how: First, Identify the target content database to move your site collection. You can create new content database with New-SPContentDatabase cmdlet. Next, Run Move-SPSite cmdlet with site collection URL and database name parameters.

Syntax:
Move-SPSite <Site-Collection-URL> –DestinationDatabase "<Database-Name>"
Example:
Move-SPSite "http://intranet.crescent.com/sites/ops" –DestinationDatabase "SP13_Intranet_Content08"
Here is our script in action:
move site collection to another content database sharepoint 2010 using powershell
Tips: To find the current database of the site collection, use: Get-SPSite "Site-collection-url" | Select ContentDatabase

Here is an alternate approach: Move SharePoint Site Collections between Content Databases

How to Delete Site Collection using PowerShell in SharePoint

$
0
0
To delete any SharePoint site collection, You have use SharePoint Central Administration site. Navigate to :
  • SharePoint 2013 Central Administration >> Application Management 
  • Click on Delete a site collection link under Site Collections group
    how to delete site collection powershell
  • Select the site collection to delete
    delete site collection powershell sharepoint 2013
  • Click on Delete button to delete a site collection in SharePoint.
    powershell script to delete a site collection
Delete host named site collection with PowerShell
Hostnamed site collections can be managed only through PowerShell! Central Admin doesn't offer the provision to delete Host named site collections as it offers for Path-based sites. Following are some examples of deleting SharePoint 2013/2010 site collections using PowerShell.

Delete site collection using PowerShell
To delete site collection through PowerShell, use Remove-SPSite cmdlet.
Remove-SPSite -Identity "<Site-Collection-URL>" 
E.g.
Remove-SPSite -Identity "http://sharepoint.crescent.com/sites/operations" 
Force delete SharePoint site collection PowerShell
If you face any difficulty in deleting SharePoint site collection either from Central Admin or with PowerShell, you can force delete as:
#Get the site collection to delete
$Site = Get-SPSite http://site-collection-url

#Get the content database of the site collection
$SiteContentDB = $site.ContentDatabase

#Force delete site collection
$SiteContentDB.ForceDeleteSite($Site.Id, $false, $false)

Bulk delete site collections with PowerShell in SharePoint 2013 
How about bulk deleting multiple site collections? Say, You want to delete all site collections under the given managed path: /Sites?
Get-SPSite "http://sharepoint.crescent.com/sites*" -Limit ALL | Remove-SPSite -Confirm:$false
PowerShell to delete all site collections under a web application:
If you don't want to send your SharePoint sites to recycle bin and would like to remove them permanently, use:
#Web Application URL
$WebAppURL="http://SharePoint.crescent.com"

#Get Each site collection and delete
Get-SPWebApplication $WebAppURL | Get-SPSite -Limit ALL | Remove-SPSite -Confirm:$false

Related posts:

Fix "The form cannot be rendered. This may be due to a Misconfiguration of the Microsoft SharePoint Server state service" Error in SharePoint 2013

$
0
0
Problem: InfoPath form based list form in a migrated SharePoint 2013 environment from SharePoint 2010 gave this error message:
"The form cannot be rendered. This may be due to a Misconfiguration of the Microsoft SharePoint Server state service"
The form cannot be rendered. This may be due to a Misconfiguration of the Microsoft SharePoint Server state service
Solution: Create a State Service Application as in: How to Create State Service Application in SharePoint 2013

Related post: SharePoint 2010 InfoPath Form Error- The form cannot be rendered. This may be due to a misconfiguration of the Microsoft SharePoint Server State Service.

Configuring Audit Logs Feature in SharePoint 2013

$
0
0
Audit log reports in SharePoint used to track how your SharePoint site contents are being used or to meet any legal compliance requirements. Lets see how to enable auditing feature in SharePoint 2013.

Enable Audit Log Feature in Central Administration:
SharePoint 2013 audit settings needs to be enabled starting from Central Administration site.

  • From SharePoint 2013 Central Administration: Under Application Management, Click on Manage service applications.
  • Select "Secure Store Service application", and click on "Properties" from the ribbon.
  • Scroll down and Enable Audit section, and select the Audit log enabled box. Set the number of days to keep audit logs until purged.
    audit in sharepoint 2013 central admin
  • Click OK to save your changes.
Enable Auditing Feature at Site collection level
  • Go to your top level sites settings page (Site collection settings) 
  • Click on "Site collection audit settings" link under Site Collection Administration. 
  • In configure auditing page, enable relevant events such as "Editing Items", "Deleting or Restoring Items" check boxes
     sharepoint 2013 audit settings
  • Once done, Click on "OK" to save your changes.
To View Audit Log Reports
When audit functionally is enabled, All selected events on SharePoint site content will be automatically logged. Then we can filter and analyze the audit data for sites, lists & libraries, content types, list items (documents) in the site collection. To view Auditing reports, head on to:
  • Site Settings of the Root web
  • Click on Audit log reports under site collection Administration
  • Pick the relevant report. You can choose custom report as well.
sharepoint 2013 view audit log reports
You can enable auditing on: site collection, library/list, folder, content type levels.

Enable Auditing at Library/List Level:
  • Go to your library >> Library Settings >> Under "Permissions and Management" click on "Information management policy settings"
  • Under the Content Types, Click on the relevant content type to enable auditing on the particular item (E.g. Documents)
  • Scroll down to Auditing section and choose  the events you want to add to the audit log
    sharepoint 2013 audit document library

Trim Audit Log in SharePoint 2013:
Although auditing is a nifty feature in SharePoint, enabling auditing for a site where large number of events takes place, may result with large audit logs which can affect the overall performance of the SharePoint farm. So, It's recommended to enable audit log trimming for site collections.
trim audit logs sharepoint 2013
Related post: How to Trim audit log to Improve Performance in SharePoint

Configure Audit Settings for SharePoint 2013 Sites using PowerShell

$
0
0
Audit log feature in SharePoint helps us to analyze how SharePoint contents are being used by users or to track documents and users in accordance to compliance requirements. SharePoint 2013 audit log configuration is explained in my another post: Configuring Audit Logs Feature in SharePoint 2013 . Lets see how to enable auditing feature in SharePoint 2013 using PowerShell.

PowerShell to set SharePoint 2013 Audit Log Settings
To set SharePoint 2013 site collection audit settings using PowerShell, use this script:
Add-PSSnapin Microsoft.SharePoint.Powershell -ErrorAction SilentlyContinue

$SiteCollURL="http://intranet.crescent.com"

#Get the site collection
$Site = Get-SPSite $SiteCollURL

#Define Audit Events
$AuditLogEvents = "Delete", "Update"

$Site.Audit.AuditFlags = $AuditLogEvents
$Site.Audit.Update()

#Set Trimming Options
$Site.TrimAuditLog = $true
$Site.AuditLogTrimmingRetention = 10

Configure Audit log Settings for All Sites in SharePoint 2013
$WebApp = Get-SPWebApplication "http://sharepoint.company.com"
$AuditMask = [Microsoft.SharePoint.SPAuditMaskType]::Delete -bxor [Microsoft.SharePoint.SPAuditMaskType]::Update -boxr [Microsoft.SharePoint.SPAuditMaskType]::SecurityChange

$WebApp.sites | % {

$_.TrimAuditLog = $true
$_.Audit.AuditFlags = $auditmask
$_.Audit.Update()
$_.AuditLogTrimmingRetention = 30
}
}

For all available audit masks, refer MSDN: https://msdn.microsoft.com/en-us/library/microsoft.sharepoint.spauditmasktype.aspx

Configuring Visio Graphics Service Application in SharePoint 2013 using PowerShell

$
0
0
Visio diagrams are wonderful way to express ideas, simplify complex topologies, illustrate the process flow, etc. With Visio Services in SharePoint 2013, you can publish Visio diagrams in SharePoint so that they can be Shared and viewed online without installing Visio application in client computers.

Configuring Visio Services in SharePoint 2013
Provisioning Visio services is straight-forward. Head on to SharePoint 2013 Central Administration site, Application Management >> Service Applications >> Manage Service Applications >> Click on "New" and choose "Visio Graphics Services"
Visio Graphics services available only in SharePoint 2010/2013 Enterprise Edition! Make sure "SharePoint Server Enterprise Site features" is activated both at site collection level and site level.
Visio Graphics service application in SharePoint 2013
Fill the form with Service application name, choose Service application pool and other details. Click on "OK" to complete creation of visio service application.
Configuring Visio Services in SharePoint 2013
SharePoint 2010 allowed only .VDW Visio drawing files to be published to SharePoint. With SharePoint 2013 you can also publish .vsdx files directly!

Create Visio Graphics Service in SharePoint 2013 using PowerShell:
Add-PSSnapin Microsoft.SharePoint.Powershell -ErrorAction SilentlyContinue

#Start the service instance
Get-SPServiceInstance | Where{$_.TypeName -like '*Visio*'} | Start-SPServiceInstance

#Create new Service Application Pool
New-SPServiceApplicationPool -Name "Visio Services" -Account "Crescent\SPS_Services"

#To Re-use any existing App Pool, use: $ServiceAppPool = Get-SPServiceApplicationPool "Service Application Pool"

#Create Visio Service Application
$VisioServiceApp = New-SPVisioServiceApplication -ApplicationPool "Visio Services" -Name "Visio Service Application"

#Create Service Application Proxy
New-SPVisioServiceApplicationProxy -ServiceApplication "Visio Service Application" -Name "Visio Service Application Proxy"

To confirm everything is up and running, Go to the "Services on Server" page in the SharePoint 2013 Central Administration and make sure "Visio Graphics Service" is marked as started and under Service Applications list "Visio Graphics Service Application" is listed.

SharePoint 2013 Visio service application:
 sharepoint 2013 configure visio services

SharePoint 2013 Visio unattended service account:
If your visio diagram uses data connectivity, You must create a application id under secure store services for visio graphics services unattended operations.

Grant permissions to Visio Service account on All web applications
Make sure the service account you used for visio graphics service application is granted with dbo access to all content databases of all web applications in order to render visio web drawing. 
#Visio service Account
$VisioServiceAccount = "Crescent\VisioAppPoolAccount"

#Iterate through All Web Application
Get-SPWebApplication | Foreach-Object {
#Grant access to each web app
$_.GrantAccessToProcessIdentity($VisioServiceAccount)
$_.Update()
}
How to Publish Visio Files in SharePoint 2013: 
Upload your Visio drawings (either VDW or VSDX) to any SharePoint Library. SharePoint 2013 should render visio file in browser!

Apply Theme in SharePoint 2013 using PowerShell

$
0
0
Themes are the quick and easiest way to apply branding to SharePoint sites. In SharePoint 2013 Themes got changed and redesigned as "Composed Look" feature. As it sounds "Composed" look, it simply defines theming by combining design elements: Master page - AKA site layout, Color theme, Font schemes and background images. Read more: http://www.sharepointdiary.com/2014/12/sharepoint-2013-composed-looks-feature.html

Apply composed look programmatically in SharePoint 2013  
If you want to uniformly apply the composed look which comprises of Master Page, Image file, Font schema to all sites, you can utilize PowerShell.
Add-PSSnapin Microsoft.SharePoint.Powershell -ErrorAction SilentlyContinue

#Variables for processing
$WebURL="http://portal.crescent.com/"
$ColorPaletteURL="/_catalogs/theme/15/Palette015.spcolor"
$FontSchemeURL="/_catalogs/theme/15/fontscheme005.spfont"
$BackgroundImgURL="/_catalogs/theme/15/Tulips.jpg"

#Get the Web
$web = Get-SPWeb $WebURL

#Apply theme
$web.ApplyTheme($ColorPaletteURL, $FontSchemeURL, $BackgroundImgURL, $true)
$web.Update()
This applies the theme for given web.

Access Denied Error on Insert Picture/Link/Upload File in SharePoint 2010

$
0
0
Problem: Users getting "Access Denied" error message while trying insert a picture via SharePoint 2010 Rich text editor. Verified that the user has "Full Access" permissions on the specific list, Still gets access denied on accessing layout pages such as: /_layouts/RteUploadDialog.aspx, /_layouts/RteDialog.aspx.
sharepoint 2010 access denied on inserting picture
Found it happens to other ribbon actions as well: Insert Link or Upload file.
access denied on insert Link or Upload File in SharePoint 2010 Rich text editor

Solution: Found that the particular list is with broken permissions! Although not a perfect solution, Granting "Read" access at site level fixed this problem!

Cannot show the value of the filter. The field may not be filterable, or the number of items returned exceeds the list view threshold enforced by the administrator

$
0
0
Problem:
When trying to filter a list with large items, got this error message: "Cannot show the value of the filter. The field may not be filterable, or the number of items returned exceeds the list view threshold enforced by the administrator"
Cannot show the value of the filter. The field may not be filterable, or the number of items returned exceeds the list view threshold enforced by the administrator
Root cause:
Identified that the particular list has more than 25,000 rows in it. Filter fails as it exceeds the default threshold value configured.

Solution:
As the error message says: Your SharePoint Administrator got to update the Resource throttling threshold values from SharePoint 2010/2013 Central Administration site.Here are the steps to increase 'List View Threshold' value:
  • Open SharePoint 2010 Central Administration site
  • Go to Application Management' >> Manage Web Applications
  • Choose the web application in which you want to make the changes
  • Now from the ribbon, Click on 'General Settings >> Resource Throttling
  • In the resource throttling page, increase the "List View Threshold" value from 5000 to large number (say: 15000)
    How to Increase List view threshold value in sharepoint 2010
Please note, You may face performance issues if you increase the throttling threshold values! To avoid consider:
  • You can set predefined filters via "Modify list view" page and mitigate this issue. 
  • You can archive old list items either to a new list or a folder inside the same list.

Power Query to Extract SharePoint List Data using Excel

$
0
0
Microsoft Power Query is a Free add-in for Excel - Part of PowerBI that provides self-service Business Intelligence features. Lets see how to extract SharePoint list data using Power Query for Excel.

Step 1: Download & Install Power Query Add-in
To start with, Download the Power Query Add-in for Excel from: https://www.microsoft.com/en-us/download/details.aspx?id=39379

Once installed, You'll find a new tab "Power Query" tab added to Microsoft Excel.
power query and sharepoint 2013
Step 2: Connect to SharePoint List
To extract SharePoint list data, Click on "From Other Sources" button from the ribbon and choose "From SharePoint List"
power query excel 2013 sharepoint
Provide the URL of your SharePoint site and choose Authentication method accordingly - I Selected Windows. For Office 365, choose organizational credentials.

Once you are successfully logged in,  You'll get the Navigator page to choose your source list and click on "Load". By default, Only Lists appear in the Navigator.  Pick any list and use "Advanced Editor", change List name & "SharePoint.Tables" to "SharePoint.Contents" to get data from any library! power query connect to sharepoint list

Step 3: Remove Unnecessary columns, Perform ETL
This loads all columns from the SharePoint list. However, we may not be interested to fetch all columns. Also removing columns which are not required speeds up our data retrieval. So, Right click on the Query from Right side pane, Choose Edit.
power query sharepoint 2010 list
You'll get Power Query Editor window where you can:
  •  Add remove columns to your query -  in order to focus only on what we need
  • Merge-Append (Join-Union) from other lists
  • Perform ETL operations such as replace values, Split Columns, Group by etc.
power query for SharePoint
To Remove unnecessary columns, click on "Choose Columns" button and select only the columns that you need. Once done, click on "Load & Close" button from the ribbon. All activities inside the query editor are recorded as Steps. We can remove/Re-order them as required.
excel power query SharePoint list
To get actual values of Lookup columns, You'll have to "Expand" them. Once ready, click "Close and Load" from the Query Editor ribbon, and the list data will load to your workbook,
Although "Export to Excel" can retrieve data from SharePoint list, Power Query has much more capabilities. 

So next time, without the need to open SharePoint site in browser, You can just open the Excel file and Hit refresh! Once the data is loaded, We can utilize advanced features such as: Pivot Table, Pivot Chart, etc to output a variety of visual data in Excel worksheet.

I used this Power Query tool with SharePoint 2010 and SharePoint 2013.
Viewing all 1058 articles
Browse latest View live


<script src="https://jsc.adskeeper.com/r/s/rssing.com.1596347.js" async> </script>