A SharePoint web application may have hundreds or thousands of site collections. Providing same access to all of those site collections for a set of users can be difficult task, isn't it? So here is where SharePoint Web application Policies comes to play. Consider these practical scenarios where:
Permissions applied using web application User Policy simply supersedes all other permissions applied at the individual site collection level. E.g., if a user has Read access to some site collections, granting the Full Control permission gives the user "Full Control" all site collections within the entire web application. With web application level permission policies you can control centrally manage access to all content in the web application without individually adding site collection administrators on each site.
Deny permission level takes precedence over any existing permissions applied. E.g. Applying Deny All to a user prevents any and all access to a web application and all its site collections. BTW, Deny policy at web application level is the only way to block someone's access to SharePoint.
To access the user policy for a web application using Central Administration:
To add a new policy, click the Add Users link. Then perform the following steps:
Edit Existing User Policies:
To edit any of the existing policy:
To Delete a Web Application User Policy:
To remove a user policy, simply select the policy and click on "Delete Selected Users" link, Confirm when prompted.
As a best practice, use Active directory security groups in SharePoint web application user policies as adding individual users triggers search crawl to trigger. This procedure applies to all version of SharePoint SharePoint 2016, 2013, 2010, and 2007!
Related post: PowerShell script to Add Web Application User Policy in SharePoint![]()
- Your SharePoint search crawl account needs read access on all site collections.
- You'll have to provide Read access to all site collections to "Auditors" group of your organization
- You may want to provide read access to all users for an Intranet web application.
- Your CIO wants to get Full control on all site collections.
- Your fellow farm administrator needs full control over all site collections on the SharePoint 2013 web application, etc.
- Full Control
- Full Read
- Deny Write
- Deny All
Permissions applied using web application User Policy simply supersedes all other permissions applied at the individual site collection level. E.g., if a user has Read access to some site collections, granting the Full Control permission gives the user "Full Control" all site collections within the entire web application. With web application level permission policies you can control centrally manage access to all content in the web application without individually adding site collection administrators on each site.
Deny permission level takes precedence over any existing permissions applied. E.g. Applying Deny All to a user prevents any and all access to a web application and all its site collections. BTW, Deny policy at web application level is the only way to block someone's access to SharePoint.
To access the user policy for a web application using Central Administration:
- Open SharePoint 2016/2013/2010 Central Administration site as a Farm Administrator
- Click Application Management >> Select Manage Web Applications.
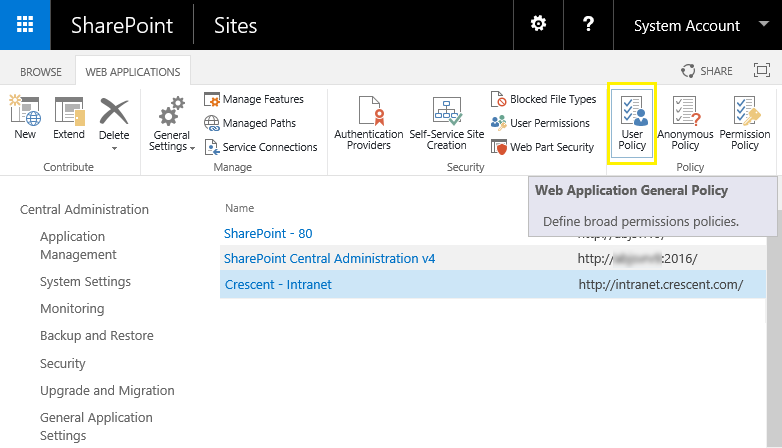
- Select your target web application >> Click the User Policy button from the ribbon.
![web application policy in sharepoint 2013]()
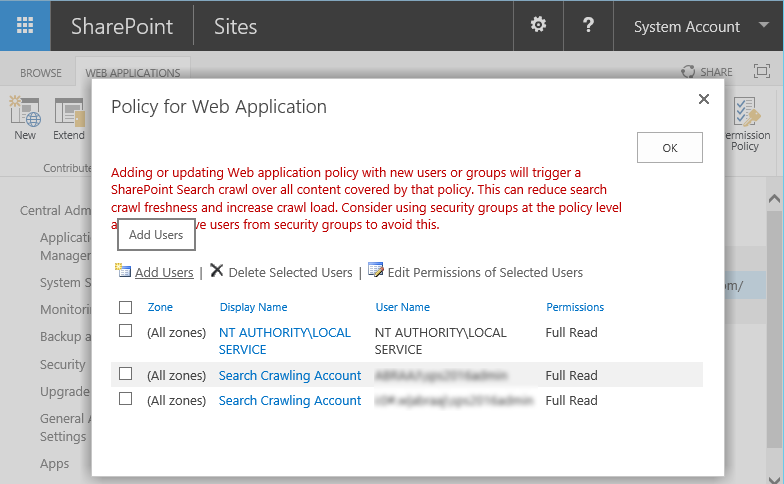
- This page lists all user policies created for the web application. Usually, you'll find the search service application crawl account here with full read access user policy to granted.
![web application user policy sharepoint 2016]()
To add a new policy, click the Add Users link. Then perform the following steps:
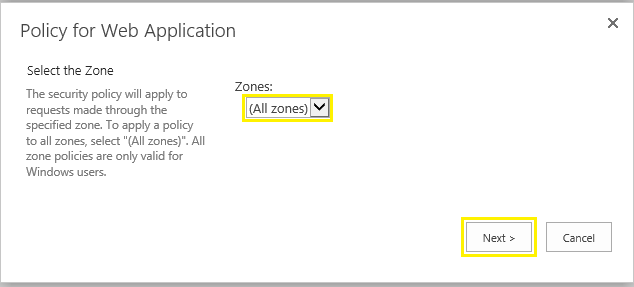
- From the Policy for Web Application dialog box, click on "Add Users" link.
- Select All Zones for the web application and click on Next (You can optionally select a single zone such as Internet and limit the policy with the zone)
![web application policy sharepoint]()
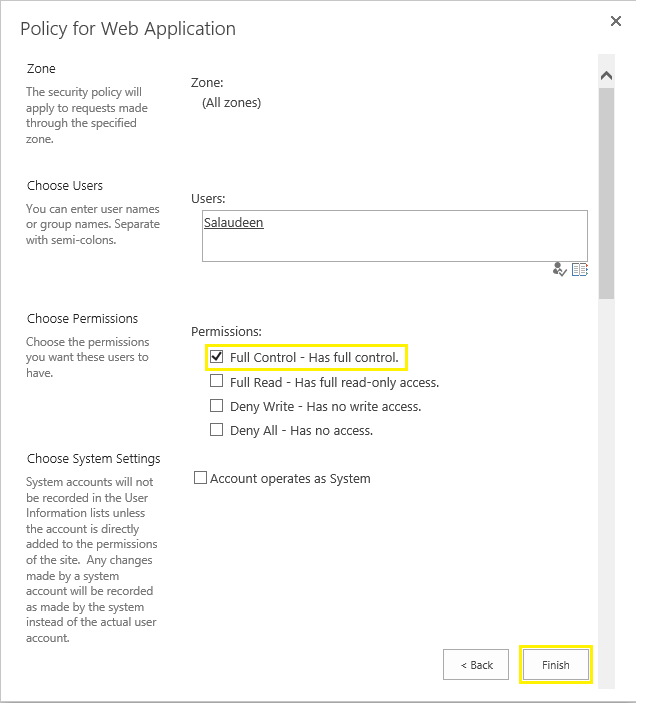
- Enter one or more user account names or security groups. You can enter multiple users or security groups.
- Select the permission policy levels that you want to apply. You can add custom permission policy levels from "Permission Policy".
- Optionally, you can select the "Account Operates As System" check box, which means if a user creates or modifies any item in this web application, the Created By and Modified by entries will be shown as: System Account.
![Add user to web application user policy sharepoint 2016]()
- Click Finish to save your changes. This ensures consistent security permissions across site collections of a web application.
Edit Existing User Policies:
To edit any of the existing policy:
- Click on the corresponding "Display Name" value (or you can check the policy and click the Edit Permissions Of Selected Users link).
- In the edit policy dialog box, adjust any required settings, such as permissions and click on Save once done..
To Delete a Web Application User Policy:
To remove a user policy, simply select the policy and click on "Delete Selected Users" link, Confirm when prompted.
As a best practice, use Active directory security groups in SharePoint web application user policies as adding individual users triggers search crawl to trigger. This procedure applies to all version of SharePoint SharePoint 2016, 2013, 2010, and 2007!
Related post: PowerShell script to Add Web Application User Policy in SharePoint