Introduction
One of the main purposes of SharePoint is collaboration: a group of people can conveniently work with shared documents, making teamwork especially efficient. Usually, text documents are created and edited using Microsoft Word, but when the work is complete, it is convenient to convert the resulting document to PDF. This gives two advantages:
Scenario
In this article, we will follow this scenario:
Creating a workflow
We can start creating a workflow. This is performed with SharePoint Designer, like we are used to. On the ribbon click New List Workflow for Active Docs list:
![]() A dialog window for creation of a new list workflow will be displayed. Enter a workflow name and optionally a description.
A dialog window for creation of a new list workflow will be displayed. Enter a workflow name and optionally a description.
Important: select the SharePoint 2010 Workflow Platform Type in the drop-down menu, since HarePoint Workflow Extensions uses the 2010 platform type.
![]() Since in our scenario the workflow will be launched every time the document is changed (but not when created), the first action we need to check is whether the document has the Status set to Completed (otherwise no action should be taken).
Since in our scenario the workflow will be launched every time the document is changed (but not when created), the first action we need to check is whether the document has the Status set to Completed (otherwise no action should be taken).
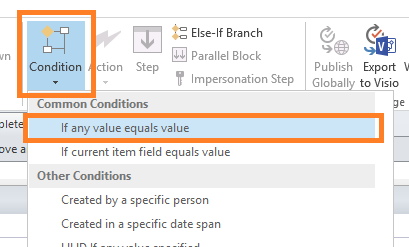
Add condition If any value equals value:
![]()
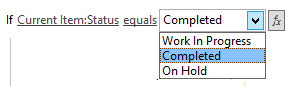
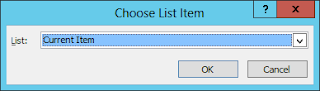
![]() In the first parameter select Current Item:Status using the lookup:
In the first parameter select Current Item:Status using the lookup:
![]() The second parameter remains equals.
The second parameter remains equals.
In the third parameter, select Completed:
![]() Now we can add what should be done when this condition is met.
Now we can add what should be done when this condition is met.
Add a Convert Document action from the HarePoint Activities – Document Conversion category:
![]()
![]() In first parameter, select Current Item. Other parameters can be left as default:
In first parameter, select Current Item. Other parameters can be left as default:
![]()
![]() The document conversion is not an immediate process, so in order to find out when the conversion has completed, we need to use the Wait Conversion Job action from HarePoint Activities – Document Conversion category:
The document conversion is not an immediate process, so in order to find out when the conversion has completed, we need to use the Wait Conversion Job action from HarePoint Activities – Document Conversion category:
![]()
![]() In the parameter, select Variable:ConversionJobId (it’s the variable that is used in the previous workflow action) using the lookup:
In the parameter, select Variable:ConversionJobId (it’s the variable that is used in the previous workflow action) using the lookup:
![]() The workflow will stay on this action until the conversion is completed.
The workflow will stay on this action until the conversion is completed.
Finally, we will move the original document to Document Sources library that is accessible only for selected team members.
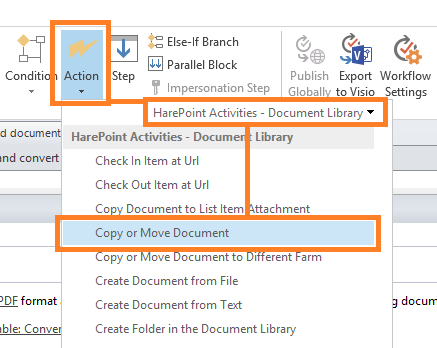
Add action Copy or Move Document from HarePoint Activities – Document Library:
![]()
![]() Switch the action from Copy to Move.
Switch the action from Copy to Move.
In the second parameter (document URL) specify Current Item: Encoded Absolute URL using the lookup:
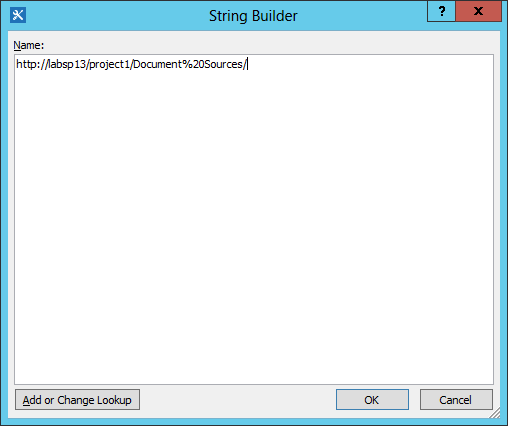
![]() In the third parameter specify the full URL of the target library:
In the third parameter specify the full URL of the target library:
(typically that looks like http://servername/sitename/subsitename/.../documentlibraryname/)
![]() Here’s what we have in SharePoint Designer:
Here’s what we have in SharePoint Designer:
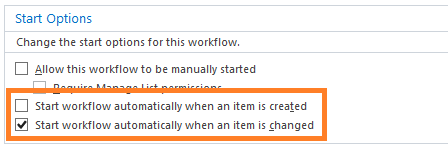
![]() Save the workflow. Modify the workflow Start Options in SharePoint Designer to make it run every time the document is changed, but not when created:
Save the workflow. Modify the workflow Start Options in SharePoint Designer to make it run every time the document is changed, but not when created:
![]() Save and Publish the workflow.
Save and Publish the workflow.
Testing a workflow
Now we can make a test. Add a Word document to Active Docs library.
The document will have an empty status field by default (this is how the Status field is set up).
![]() When the work on this document begins, team members edit the document and set the status to Work In Progress:
When the work on this document begins, team members edit the document and set the status to Work In Progress:
![]() The workflow triggers, but completes with no actions taken, just as expected.
The workflow triggers, but completes with no actions taken, just as expected.
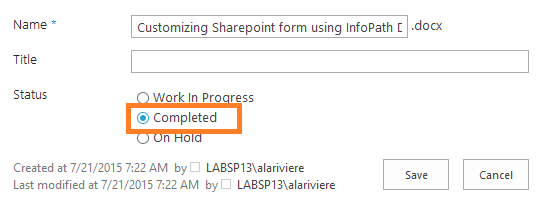
Now, change the status of the document to Completed:
![]() First, we notice the workflow status is now In Progress:
First, we notice the workflow status is now In Progress:
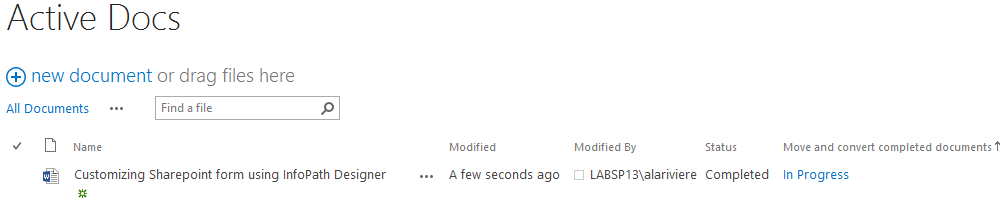
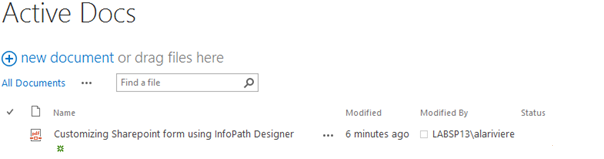
![]() After some time, all the Word document is gone and only the converted PDF remains in Active Docs:
After some time, all the Word document is gone and only the converted PDF remains in Active Docs:
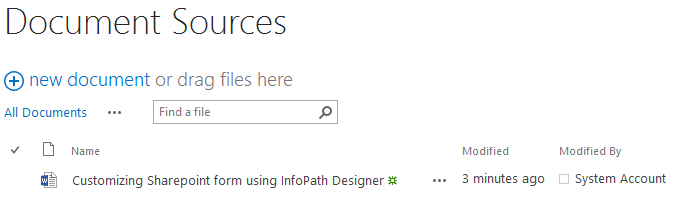
![]() Then, if we take a look at the Document Sources folder (where only selected team members have access), we see the original Word document:
Then, if we take a look at the Document Sources folder (where only selected team members have access), we see the original Word document:
![]() Conclusion
Conclusion
In this article we have reviewed an example of rather simple but efficient workflow for a Team working with shared documents, and have seen how quickly and easily the solution can be achieved by using HarePoint Workflow Extensions– just a couple of actions in SharePoint Designer and no code at all.![]()
One of the main purposes of SharePoint is collaboration: a group of people can conveniently work with shared documents, making teamwork especially efficient. Usually, text documents are created and edited using Microsoft Word, but when the work is complete, it is convenient to convert the resulting document to PDF. This gives two advantages:
- No further changes to a document are possible, so it can be safely shared
- The PDF document can be easily viewed on any device
Scenario
In this article, we will follow this scenario:
- While the team actively works with a document in the document library Active Docs, it has the status "Work in progress". As soon as the job is done the status is set to Completed.
- The workflow triggers and converts this Word document to PDF.
- When the PDF file has been created, the workflow moves the original Word document to Document Sources library. Only selected team members (such as managers, etc) have access to this document library.
- As a result, only the PDF file remains in the original document library, so everyone can view and share this document. This way, the document can be opened easily (also on any mobile device), and at the same time no deliberate or inadvertent changes can be made.
Creating a workflow
We can start creating a workflow. This is performed with SharePoint Designer, like we are used to. On the ribbon click New List Workflow for Active Docs list:

Important: select the SharePoint 2010 Workflow Platform Type in the drop-down menu, since HarePoint Workflow Extensions uses the 2010 platform type.

Add condition If any value equals value:


In the third parameter, select Completed:
Add a Convert Document action from the HarePoint Activities – Document Conversion category:


Finally, we will move the original document to Document Sources library that is accessible only for selected team members.
Add action Copy or Move Document from HarePoint Activities – Document Library:

In the second parameter (document URL) specify Current Item: Encoded Absolute URL using the lookup:

(typically that looks like http://servername/sitename/subsitename/.../documentlibraryname/)

Testing a workflow
Now we can make a test. Add a Word document to Active Docs library.
The document will have an empty status field by default (this is how the Status field is set up).


Now, change the status of the document to Completed:
In this article we have reviewed an example of rather simple but efficient workflow for a Team working with shared documents, and have seen how quickly and easily the solution can be achieved by using HarePoint Workflow Extensions– just a couple of actions in SharePoint Designer and no code at all.